
Welcome to Unlock Your Financial Potential! Discover the Ultimate Credit Repair Software Solution.
Unlock the secrets to success! Immerse yourself in our captivating videos below to kickstart the process.
Unlock the Power of Your Credit Score!
Are you ready to take your credit score to the next level? If so, you're in luck because I have the perfect solution for you. Introducing my free score now – an incredible tool that will connect you directly to unparalleled data and unlock the secrets to improving your credit. This is your chance to embark on a journey towards financial success, and it all starts with a simple click of a button. When you click the button below, you'll be transported to our website where you can sign up and pull your new credit report. Armed with this valuable information, you'll be able to make informed decisions and take control of your credit. But that's not all – we have so much more in store for you! Once you've retrieved your credit report and returned to this page, we'll guide you through the essential steps of document organization and setup. This is a crucial part of the process, as it will pave the way for seamless access to our remarkable software. With everything organized and set up properly, you'll have the tools you need to monitor and track your progress. Are you ready to embark on this credit score mastery journey? Are you ready to take charge of your financial future? If the answer is yes, then let's do this! Don't wait any longer – click the button below and let's get started. Your credit score transformation starts now, and together, we can make it happen.
Credit ReportBank-Ready Identification Document Submission Guide
Introduction
- Overview: A quick guide on preparing identification documents for bank submissions.
- Objective: Ensure your ID and proof of security are correctly presented to avoid rejection.
Step 1: Recognizing Common Errors

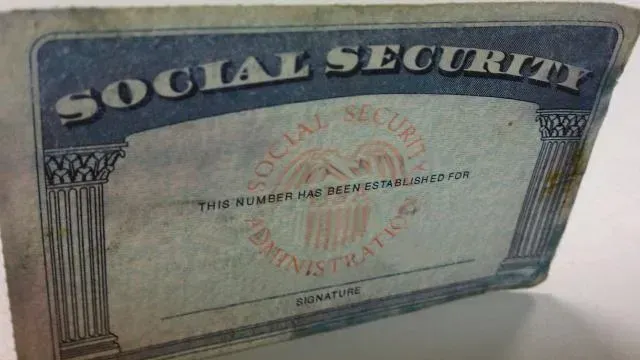
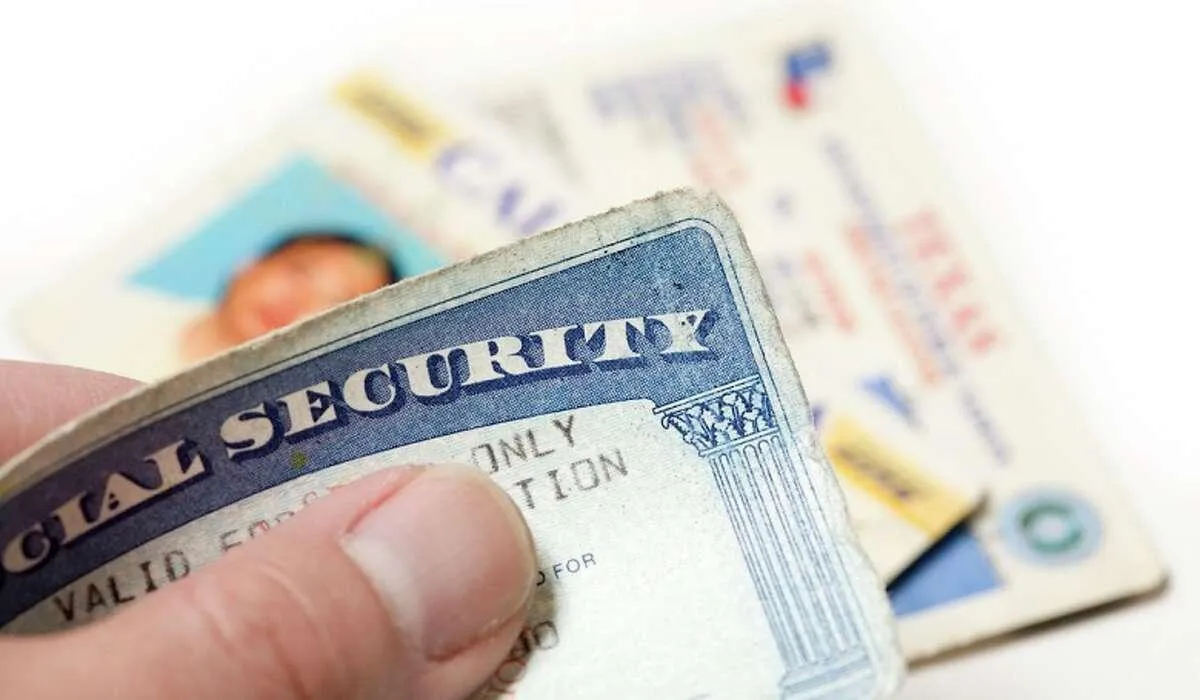
Understanding the Pitfalls
Before diving into the correct methods of preparing your identification documents for submission, it's crucial to recognize and understand the common mistakes that can lead to rejection. This step focuses on identifying these errors so you can avoid them.
Common Mistakes to Avoid:
Incorrect Handling of IDs:
Holding the ID in your hand while taking a photo is a major mistake. It can obscure important details and gives an unprofessional appearance.
Poor Orientation and Positioning:
Placing the ID in any random orientation can lead to important information being missed or misrepresented. The ID should be laid out flat and in a clear, standardized orientation.
Inadequate Lighting and Background:
Poor lighting and a cluttered background can make the details on the ID hard to discern. This can lead to automatic rejection by verification systems.
Learning from These Mistakes
Understanding these common errors is the first step towards perfecting your document submission process. Each of these mistakes can significantly impact the readability and acceptability of your documents.
Key Takeaways:
Avoid holding the ID in your hand: Always place it on a flat,
neutral-colored surface.
Pay attention to orientation: Ensure the ID is laid out horizontally
or vertically as per its natural design.
Ensure clear visibility: Use good lighting and a simple background
to highlight the ID's details.
By familiarizing yourself with these common errors, you're now
betteDividerr equipped to prepare your documents correctly.
Remember, the goal is to make your submission as clear and
professional as possible to avoid any issues with acceptance.
Steps 2 & 3: Proper Handling and Orientation of Identification Documents
Mastering the Art of Document Presentation
After understanding what not to do, it's time to focus on the correct ways to handle and orient your identification documents. This combined step will guide you through the process of preparing your ID and social security card for submission in a manner that meets professional standards.


VS.
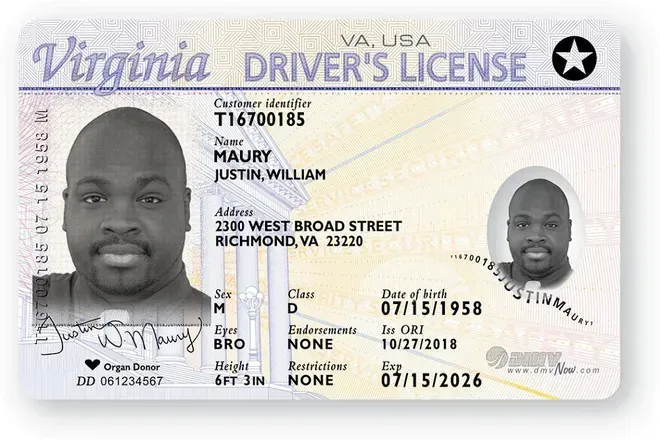
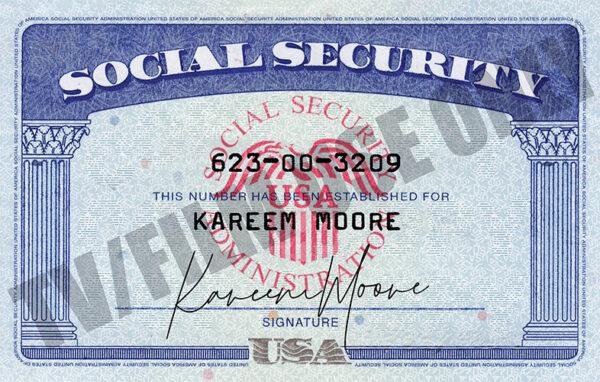
Proper Handling of IDs
Best Practices:
Avoid Personal Contact:
Never hold the ID in your hand while photographing it. Your hand can cover important details and detract from the document's professionalism.
Neutral Background:
Use a neutral, uncluttered background. This ensures the focus remains on the ID without any distractions.
Neutral Background:
Use a neutral, uncluttered background. This ensures the focus remains on the ID without any distractions.
Optimal Orientation and Positioning
Orientation Guidelines:
Horizontal or Vertical Placement:
Lay the ID in its natural orientation. If it's designed to be read horizontally, place it left to right; if vertically, then top to bottom.
Direct Overhead Photography:
Take the photo from a vertical position above the ID. This avoids angles and shadows, ensuring all details are visible and clear.
Combining Handling and Orientation for Perfect Submission
The key to a successful document submission lies in the combination of proper handling and correct orientation. By placing your ID on a flat, neutral surface and photographing it in its natural orientation, you ensure that all the necessary details are captured clearly and professionally. This approach not only enhances the readability of your document but also conveys a sense of professionalism and attention to detail.
Key Takeaways:
No Personal Contact: Keep your hands away from the ID during photography.
Neutral and Uncluttered: Choose a simple background for clarity.
Correct Orientation: Align the ID in its natural reading direction.
Direct Overhead Shots:Avoid angles to ensure a clear, flat representation of the document.
By mastering these steps, you're ensuring that your identification documents are presented in the best possible way, increasing the likelihood of smooth and successful submissions.Divider
Steps 4, 5 & 6: Ensuring Visibility, Avoiding Angles, and Showcasing Good Examples
Crafting the Perfect Document Presentation
In these steps, we focus on the critical aspects of document visibility, angle avoidance, and demonstrating what good examples look like. This guidance is designed to ensure that your identification documents are presented in the best possible way for submission.
Ensuring Visibility and Clarity
Visibility Guidelines:
All Corners Visible:
Ensure that the entire document is in view, including all four corners. This is crucial as it guarantees that no important details are cropped out or missed.
Clear and Legible:
The document should be bright and clear, with every detail, including text and images, being legible. Aim for the quality that mimics a scanned document.
Avoiding Angles and Shadows
Angle and Shadow Avoidance:
Flat and Direct Photography:
Always photograph the document from directly above. This approach prevents angled photos that can distort information and create shadows, affecting clarity.
Consistent Lighting:
Ensure the lighting is even and shadow-free to maintain the document's true color and detail.
Showcasing Good Examples


What Good Looks Like:
Model ID and Social Security Card:
Present your ID and social security card by adhering to the above guidelines. These documents should serve as the standard to aim for, being clear, well-oriented, and fully visible.
Highlighting Quality:
Focus on the quality of the image, ensuring that every detail is captured accurately and clearly.
Bringing It All Together
By focusing on visibility, clarity, and proper presentation techniques, you set a high standard for your document submission. This section guides you through preparing your documents in a professional and acceptable manner, aiming for success on the first submission.
Bringing It All Together
By focusing on visibility, clarity, and proper presentation techniques, you set a high standard for your document submission. This section guides you through preparing your documents in a professional and acceptable manner, aiming for success on the first submission.
Key Takeaways:
Complete Visibility: Make sure all parts of the document are visible and clear.
Direct and Flat Photography: Use a direct overhead approach to avoid angles and shadows.
Benchmark Quality: Strive to match the quality of good examples, ensuring clarity and legibility.
With these steps, you're equipped to prepare your identification documents to meet professional standards and requirements, enhancing the likelihood of a smooth submissDividerion process.
Final Steps: Proof of Address, Document Format, and Conclusion

Ensuring Accurate Proof of Address and Correct Document Format
The final steps in preparing your identification documents involve selecting the right proof of address (POA) and ensuring your documents are in the correct format. These steps are crucial for the successful submission of your documents.
Proof of Address (POA)
Selecting the Right Documents:
Types of Acceptable POA:
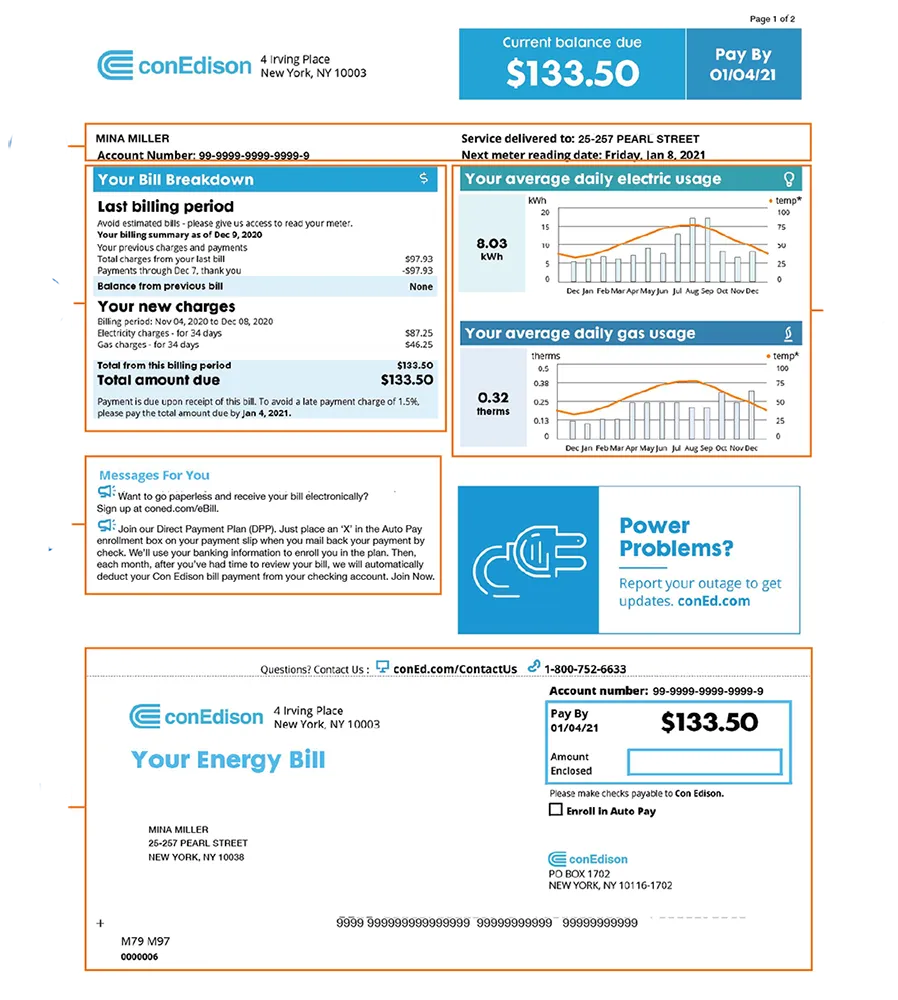
Use basic bills such as phone, TV, or electricity bills. These should be documents that are mailed to your residence and contain your address.
Full Document Visibility:
Ensure the entire document is visible in your submission. This includes all text and any headers or footers. Partial documents may be rejected as they don't provide complete information.
Document Format and Quality
Choosing the Right Format:
JPEG or PNG Formats:
Save and submit your documents in JPEG or PNG formats. These formats are widely accepted and ensure good image quality.
Maintaining Quality:
Ensure the documents are clear and professional-looking. The quality of your submission reflects on its credibility and can impact the acceptance of your documents.
Conclusion: Setting Up for Success
By following these guidelines, you're not only preparing your documents correctly but also presenting them in a professional manner. This increases the likelihood of your documents being accepted without the need for additional verification or correction.
Key Takeaways:
Appropriate POA Selection: Choose bills or statements that clearly show your address and are recognized as valid proof of residence.
Complete Document Submission: Always provide the full page of any document to avoid doubts about its authenticity.
Correct Format and Quality: Use JPEG or PNG formats for clear and professional-looking documents.
Final Advice:
Double-Check Your Documents: Before submitting, review your documents for completeness and clarity. Ensure that they meet all the guidelines mentioned in this guide.
Professional Presentation: Remember, the way you present your documents can significantly impact their acceptance. Aim for a clear, professional, and accurate presentation.
By adhering to these final steps, you are ensuring that your document submission process is smooth and successful, setting you up for a positive outcome.
This combined section provides a comprehensive guide for the final stages of document preparation, emphasizing the importance of correct POA selection, document format, and overall presentation. It's designed to be informative and user-friendly, perfect for your website audience.
Discover the revolutionary power of our AI credit repair software! Gain exclusive access today and experience a game-changing credit journey. Join us now to unlock the future of credit repair!
Step-by-Step Process
Unlock Your Journey to Credit Repair and Improve Your Credit Today! Are you tired of dealing with a low credit score? Ready to start the journey to credit repair and improve your financial standing? Look no further! Our credit repair platform is here to help you every step of the way. With our easy sign-up process, hassle-free document upload, and power-packed features, you'll be on a fast track to an improved credit score in no time. To get started, simply locate the 'Click to Sign Up' button at the bottom of your screen. Click on 'Register' to kick off the process. Our easy registration will guide you through the necessary steps to create your account. Enter your personal information accurately, including your first name, middle name (if applicable), and Social Security number. Don't forget to create a unique username and password to secure your account. Once you've filled out all the necessary details, hit the 'Register' button and move on to the next screen to finalize your profile. This is where you provide in-depth information, such as your address, city, and state. It's crucial to ensure every detail is correct to ensure smooth progress. We understand the importance of verifying your identity. That's why we've made it easy to upload your documents. Simply provide a clear, high-quality photo ID, legal identification number (such as your passport or social security number), and proof of address. Remember to save your documents in the correct JPEG format for seamless uploads. Once you've saved your information and documents, you're on your way to unlocking our power-packed features. Our platform allows you to access your accounts, generate letters, and closely monitor your credit report. Keep track of your progress effortlessly as we work together to repair your credit. Here's a pro tip: Help us help you. By entering your data directly into our system, you speed up the credit repair process. Our AI and expert team can work more efficiently to provide you with faster results. The sooner you start, the sooner you can enjoy the benefits of an improved credit score. Congratulations! You're on the final step of this journey. With your data securely inputted, you're now on the fast track to improved credit. Our streamlined system is designed to make this journey quicker and more efficient, giving you the credit repair you deserve. So don't wait any longer. Take control of your credit today and unlock the path to financial freedom!
Click to Sign UpYes. because my freescorenow is the best credit report pull for the software it help the Ai better do what it needs to attack the negative items on your credit score
depending how well you understand the information and can type this could be done in about 15 minutes and our team can start attacking your negative with in 24 hours if this guide is done correctly.
Just login into your portal and yes you will be able to change or update documents as you see fit.